
Please follow the instructions below or download PDF.
Step 1.
Select which mount works best for your shutter-release button shape. Ideal fit is when the mount edges are flush (no gaps) with your shutter-release.
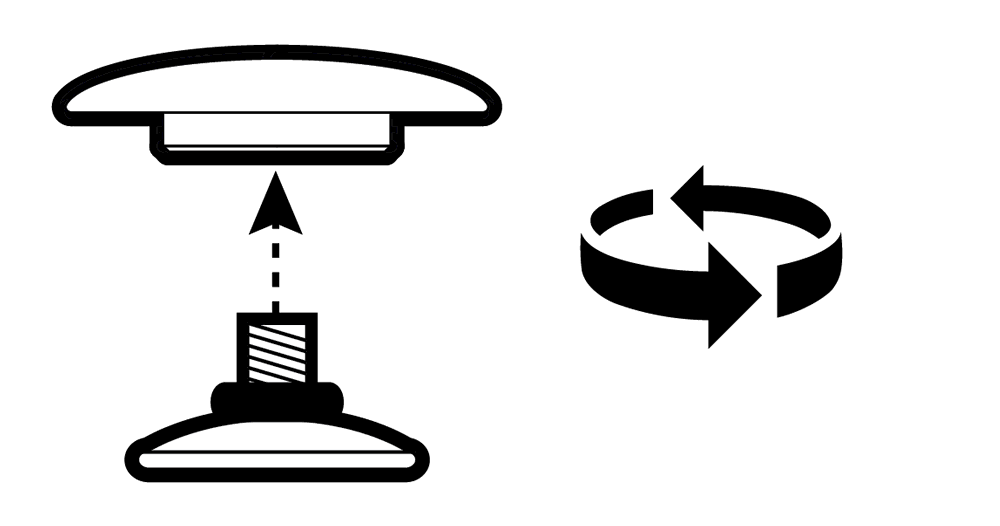
Step 2.
Screw the button to the mount. Ensure the threads are engaged correctly. It should be smooth when turning. Do not over-tighten the soft-release button to the mount. A slight turn after initial contact with the O-ring (black rubber circle) is enough
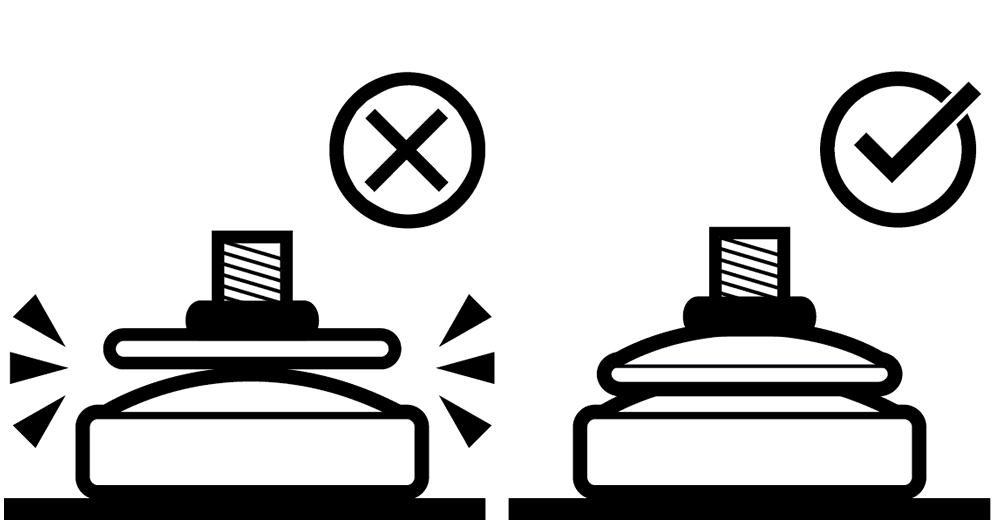
Step 3.
Screw the soft-release button and the mount together and test clearances around your shutter-release before final installation to ensure there are no obstructions.

Step 4.
Wipe the shutter with a microfiber or lint-free cloth to prepare for final cleaning.
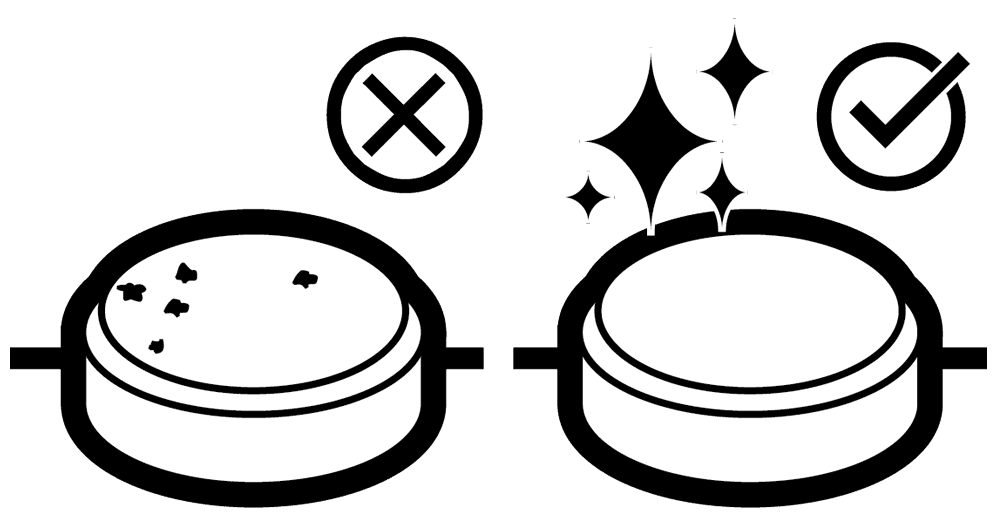
Step 5.
Open alcohol prep pad. Use one corner to gently clean the shutter release button. The cleaner the surface, the stronger the bond.
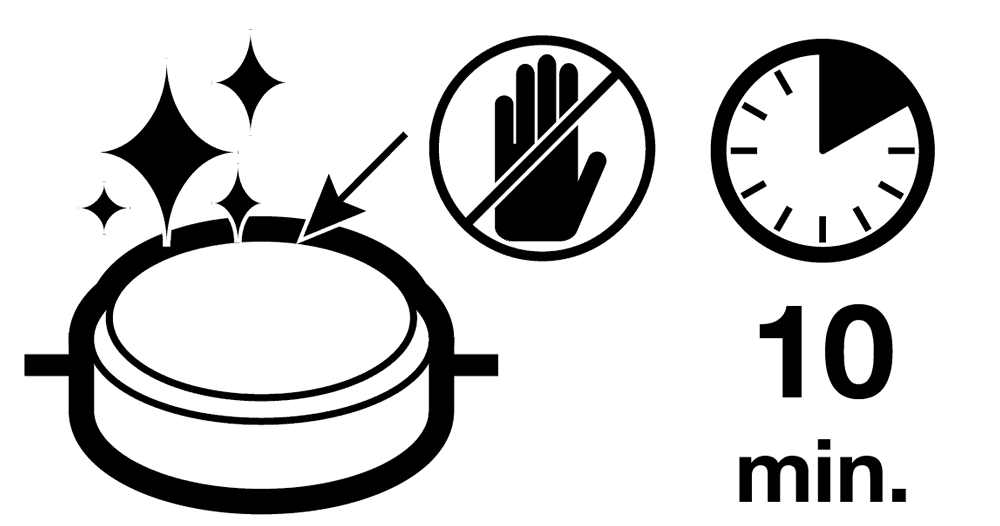
Step 6.
Allow the cleaned shutter-release to dry completely (10 minutes). Do not touch, as fingertips contain oils which will weaken the bond.
Step 7.
Unscrew the soft-release button from the mount. This will help your view in centering the mount on your shutter-release.
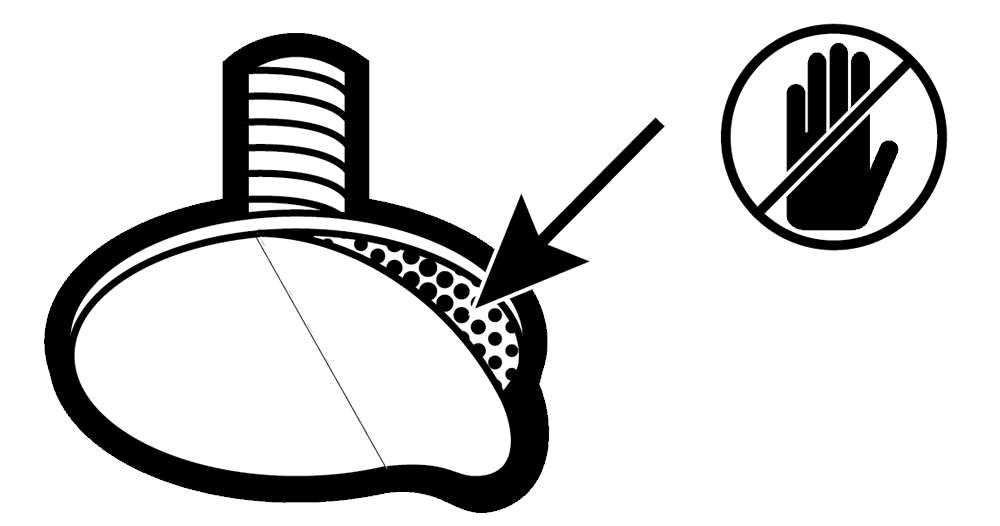
Step 8.
Carefully peel the backing off the Lolumina button. Do not touch the adhesive. You may want to use a knife or similar thin object to carefully peel away the adhesive backing.
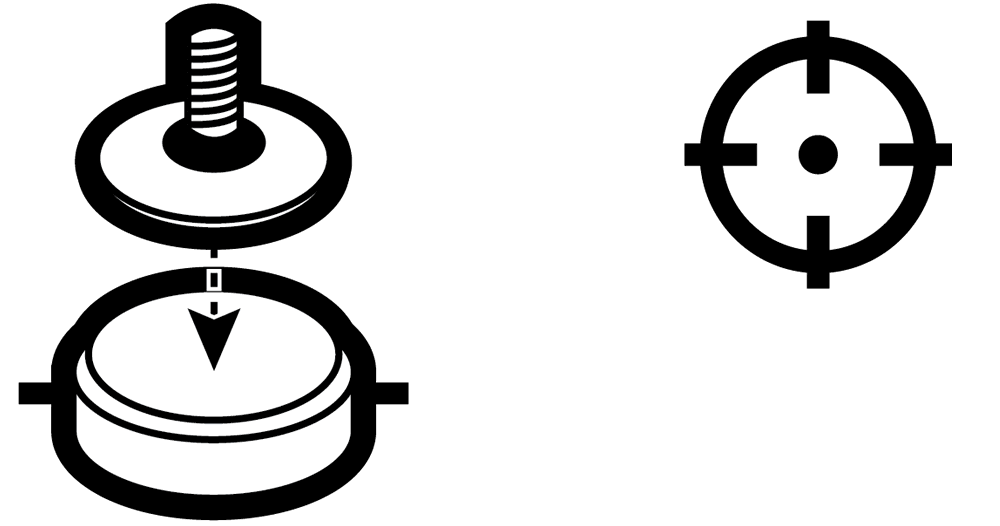
Step 9.
Carefully place the mount on the center of your shutter release. Be precise in locating the center of your button. Once it touches, repositioning is not possible. If you do, the adhesive will be compromised.
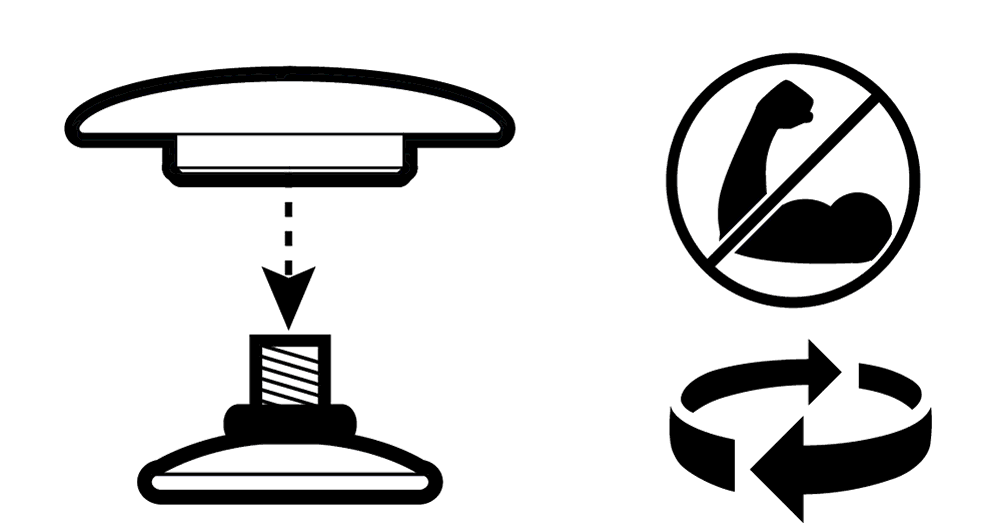
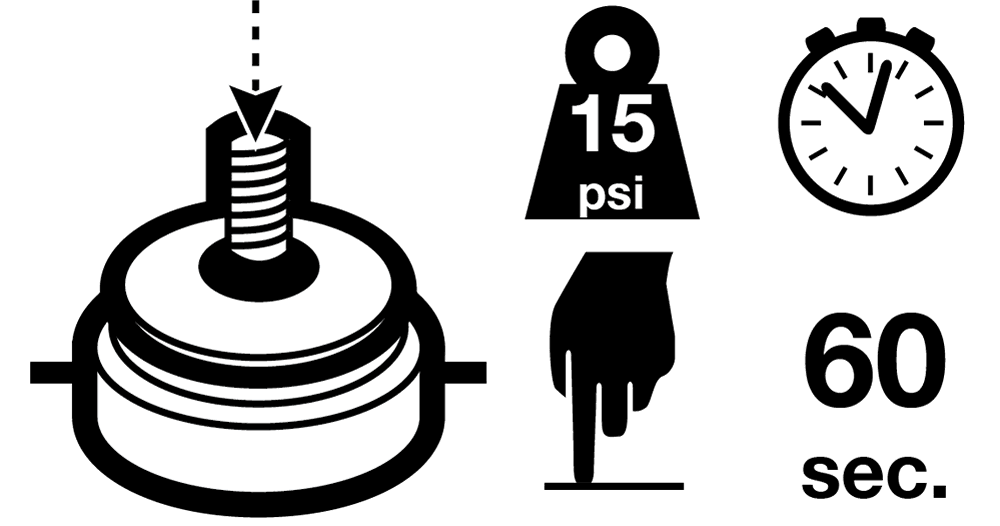
Step 10.
Once adhered, firmly press the button onto the shutter-release with even pressure and hold for 60 seconds.
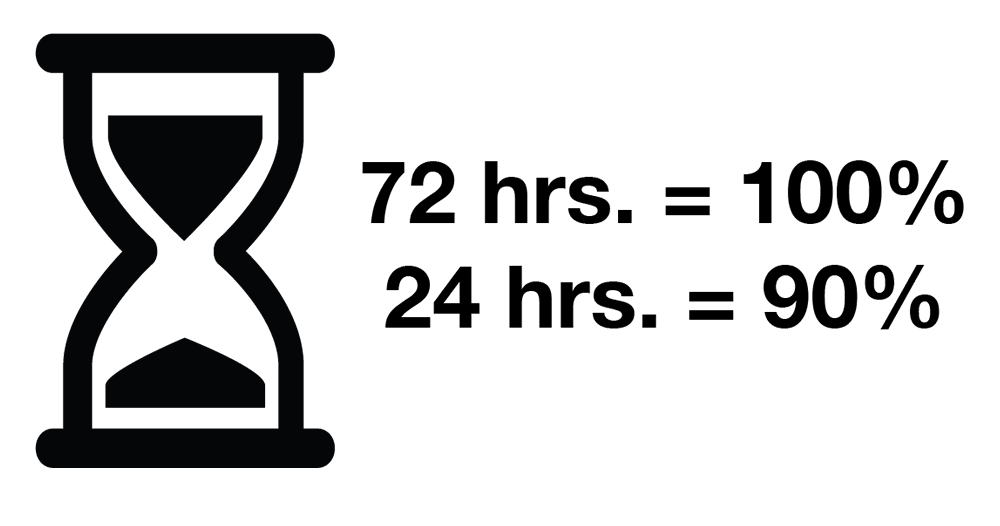
Step 11.
Allow the button to adhere to full strength (72 hours). Next ideal would be to wait at least 24 hours before use (90% strength).
Step 12.
Screw the button to the mount. Ensure the threads are engaged correctly. It should be smooth when turning. Do not over-tighten the soft-release button to the mount. A slight turn after initial contact with the O-ring (black rubber circle) is enough.
If your shutter button rotates, then use a thin, blunt object, like a butter knife to gently press against the rubber O-ring to hold it in place while screwing the button.
Enjoy your Lolumina Soft-release Button


Hi – what do you recommend for Leica Q?
Hello,
We are not sure about that. We have created a PDF for you to print out to get a sense of the size and dimensions of the Lolumina soft-release button. Print the PDF at 100% and do not scale for accuracy.
http://lolumina.com/wp-content/uploads/2014/06/lolumina_size_guide_v2.pdf
Have a nice day.
Lolumina
Hi,
I own a Fujifilm XT-1.
I have no idea how to release the original button.
Can you help me please?
All the best.
Thanks in advice
Hello Felipe,
Here is http://cdn.lolumina.com/wp-content/uploads/2014/07/lolumina_instructions1.pdf for your review.
Have a nice day.
My button was glued to the packaging and as a consequence no way to get it to adhere without a new adhesive substance. By shudder is Olympus EM 5 II and appears to be metal. Thank you
Going to be rocking the A6000 soon! What would you recommend?
Hi, 10mm and 13mm complete-kits work fine for it.
I have a fujifilm x-t10, which soft release button should I purchase? Thanks!
Hi, our buttons are designed for the camera with non-threaded shutter. It can’t fit for Fujifilm x-t10.