
Please follow the instructions below to safely remove your Lolumina soft-release. Do not force the button off, doing so could damage your camera. Download PDF
Step 1.
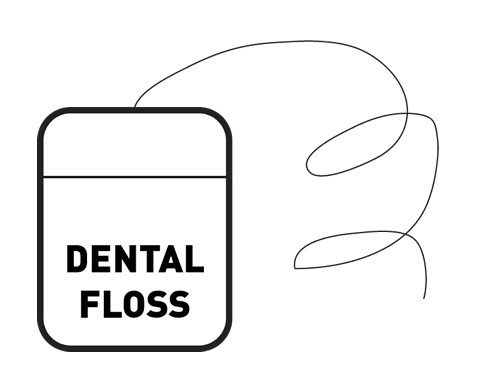
Get some “Glide” brand or other very thin dental floss. The type of floss is important because you want it to be able to slide between the mount and adhesive disc. If it is too thick then this will be difficult.
Step 2.
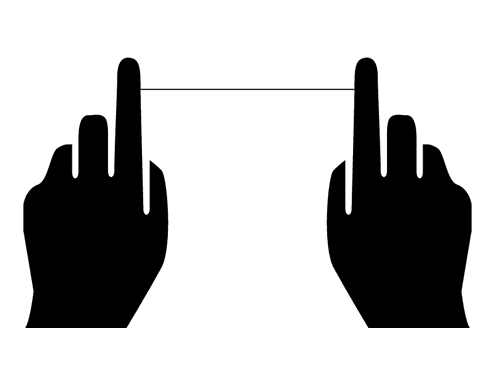
Get a roughly 18″ long piece of dental floss and secure ends around index fingers.
Step 3.
Hold camera steady on lap in-between legs.
Step 4.
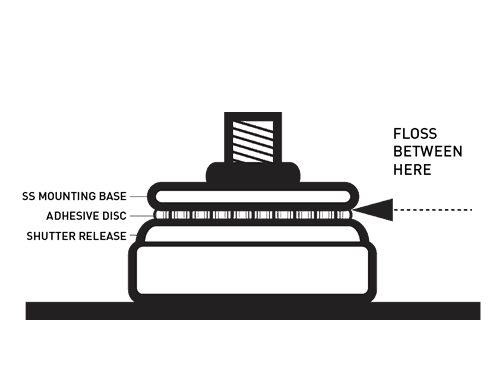
Slowly and gently floss between the adhesive disc and the bottom of the SS mounting base. Do not use too a lot of force, and double-check that the placement of the floss is the same in the image. If the adhesive is very sticky, apply a light coating of dish soap on the floss thread to ease in separation.
Step 5.
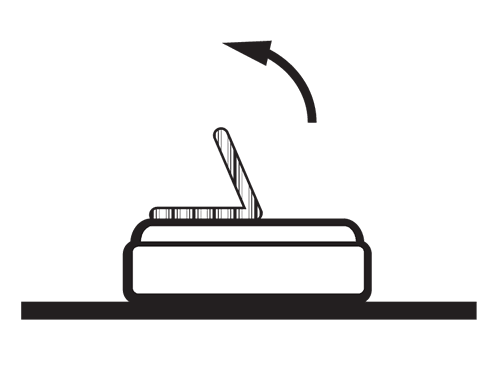
Continue to floss and wiggle the button to see if it is safe to peel and remove the button. There should be no force required to peel the mount when it is safe to remove.

Step 6.
Once the mount is removed, slowly peel the adhesive disc away at an angle of 90º or less while holding the clear part of the shutter release button. The adhesive should not leave any residue.


I remain very, very skeptical. I have too much invested in my Canon 5d Mark IV body (nearly $3,000 for the body) to risk damaging it. I’ll wait until there’s been more experience and posted impartial reviews.
Also, since your installed threaded-on button protrudes away, leaving a very pronounced space from the camera body, it seems to be just a matter of time until something catches on it and does serious damage to the camera. Again, I’ll wait to hear the impartial experience of others.
Thank you for the opportunity to comment.
PS: You DO NOT have permission to disclose my email address to anyone else.
Which button do you recommend for the Pentax Q system?
Hi, 10mm and 13mm complete kits fit for it. We have created a PDF for you to print out to get a sense of the size and dimensions of the Lolumina soft-release button. Print the PDF at 100% and do not scale for accuracy.
http://lolumina.com/wp-content/uploads/2014/06/lolumina_size_guide_v2.pdf